Android Studio setup for Flutter plugin
We wanted to run inference on the phone for our neural network for unwrapping. We have an application built with Flutter to provide cross-platform development, and we wanted to integrate with the mobile Pytorch library. We always tried to cut corners everywhere we could. But there were no excellent Flutter plugins that support our neural model on the current Flutter's life stage. Most plugins re-create Pytorch's mobile sample application that is classifying images, but it's required to calculate heatmaps in our case.
Since it’s super easy to call native code in Flutter, it was an idea to write a custom plugin, doing the required calculations.
But many different possible outputs can exist, and we can improve existing Flutter's ecosphere by separating part of an internal application to plugin.
This article is about how to start plugin development using Flutter and Android Studio. Currently, Flutter (1.20.3) and android-studio (3.6/4.0) have some gotchas to work it better than out-of-box.

Create your plugin#
Firstly start and empty plugin by triggering a template.
After this step, it's recommended to add everything to git and commit the created code. In the future, it might be required to repeat setup-and-reset it back several times.
Open in Android Studio#
First, you need to install Flutter plugin. Then you're ready to open your project.
You have two options on how to open your project:
- Import existing Flutter project. That isn't recommended by official documentation because the project will be broken.
- Open an existing project. That doesn't lead to a better working project in my case.
How to understand if you got a working project#
First of all, building and running a project will always work. You may have broken code completion, or Gradle won't get detected by Studio - this only affects Android Studio and doesn't prevent Gradle itself from building correct apk.
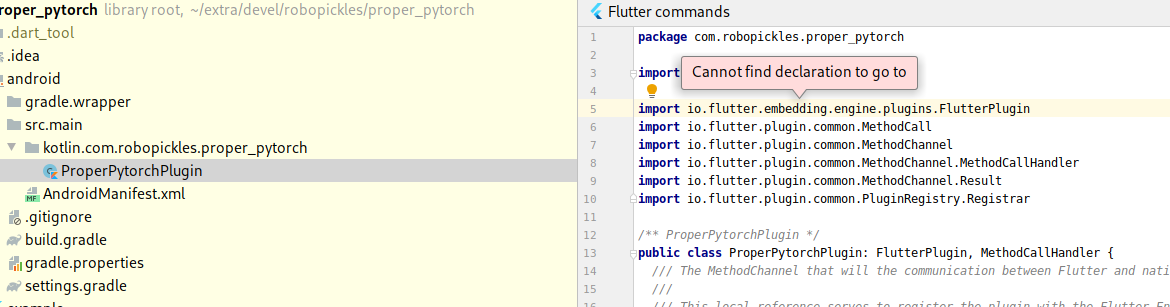
You need to open android/src/main/kotlin/com/robopickles/proper_pytorch/ProperPytorchPlugin.kt and if you can navigate by Ctrl-clicking - your're good.
But you may get something like this (Cannot find declaration to go to):
Open project in Android Studio#
I must admit that I'm not an expert in Android Studio internals. So I may be wrong in some cases, but here what I've found after multiple fresh installations and different variants of fixing it.
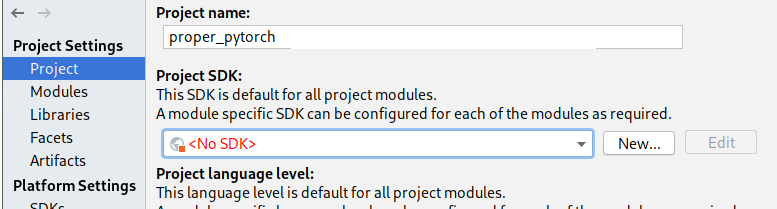
Your most significant friend is F4 button on the top-level module or File -> Project Structure via the menu.
You can use it for setting your SDK:
And check how Studio has detected your modules and dependencies in a good module.
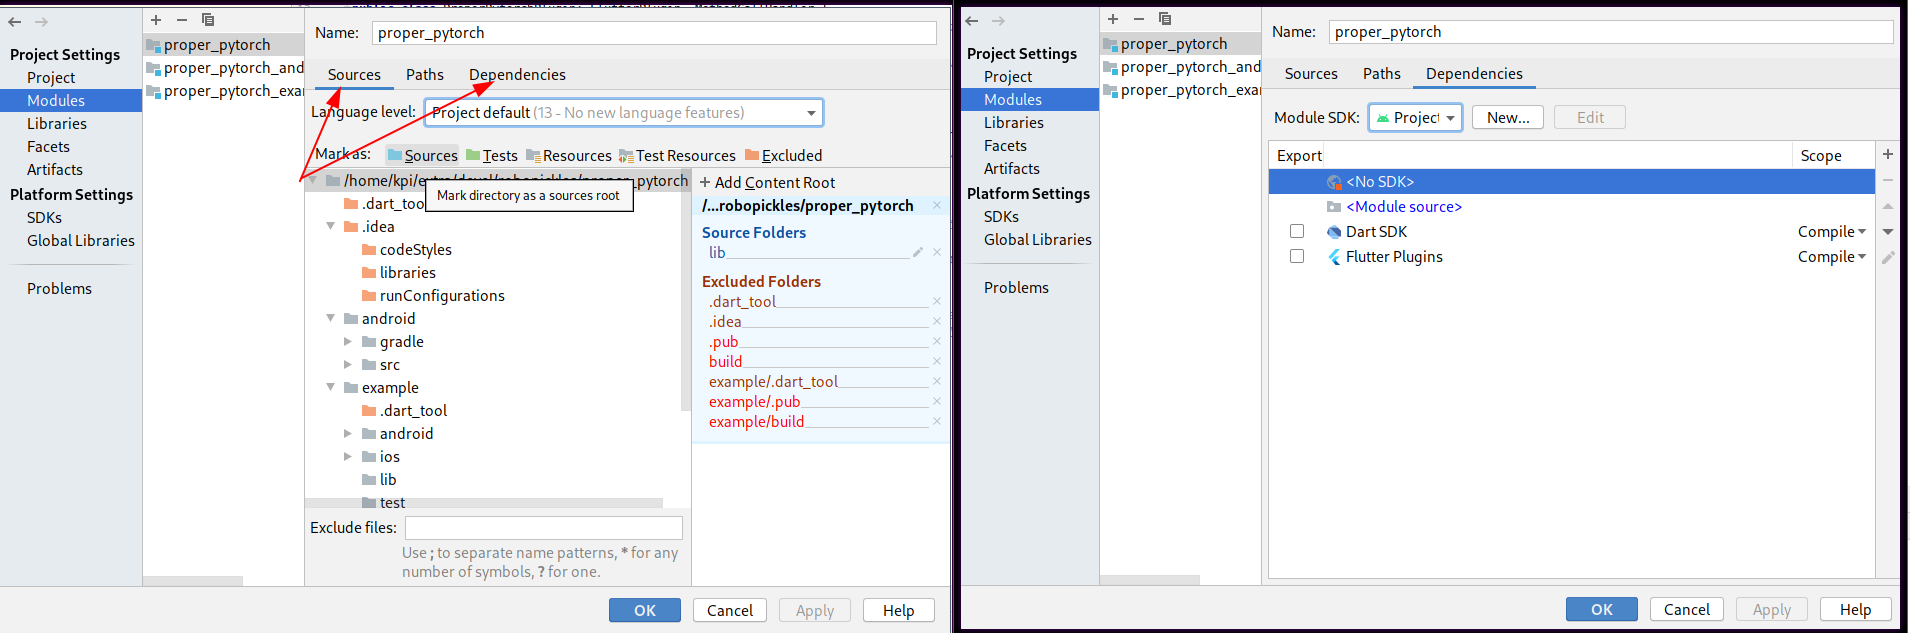
And how it looks in the bad module

If you restart Studio you get two notifications about missing iml files.
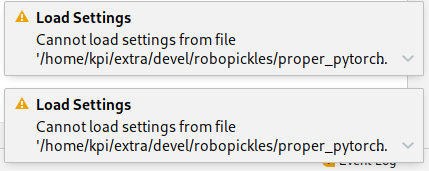
Some details about Android Studio#
This notifications are reasons for our problems. flutter create creates project from template and modules are generated by this template. You can open .idea/modules.xml and find such definition:
IML files are used by Android Studio to store information about the module. For some reason, they don't have Android Gradle settings that correct modules have.
It should look like this:
It is probably possible to fix it only with Project Structure menu. But on my installation, this view is broken for the just-generated project.
Workaround for Kotlin module#
When you have your Kotlin file opened, you may notice that Flutter suggest to open it for editing (top-right menu)

That will open the module as a new project and magically detect Gradle (on the right side)

Also, it will setup all harness and add all dependencies. Thus Kotlin's completion starts work.
That enables at least basic editing for Android code withing Studio.
And it will generate iml for this module inside nested under example/android/.idea/modules/ directory. Unfortunately, you cannot get your main project working by importing this iml file directly.
Fixing the main project#
Remove auto-generated .idea directory and all .iml files. Commit it as a clear state.
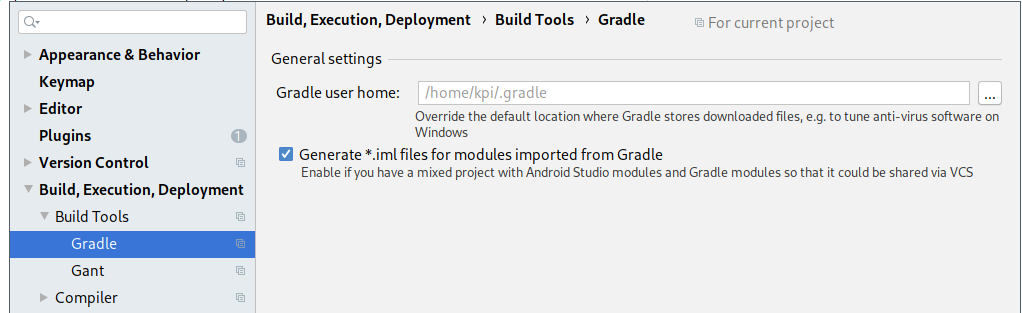
Open Settings -> Build,Exectuion,Deployment -> Build Tools -> Gradle and opt-in Generate *.iml files.
Then you need to run your application once. That will generate all required Gradle files.
Set your project SDK in Project Structure -> Project to Android SDK.
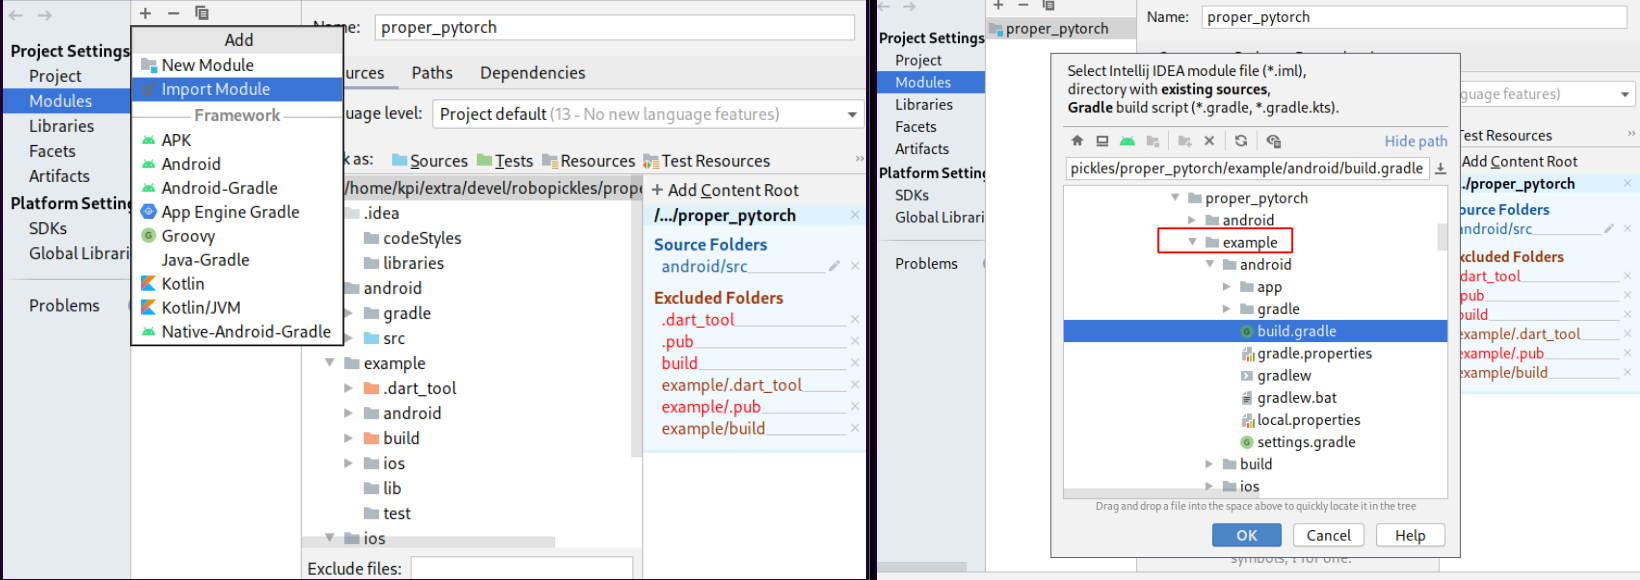
After that, you can import build.gradle from example/android directory.
After that, you should see many libraries in the Project window on the bottom of the view.
That will enable code completion. Some things (eg. running tests from Studio) still may fail. To fix that, you need to restart Studio.
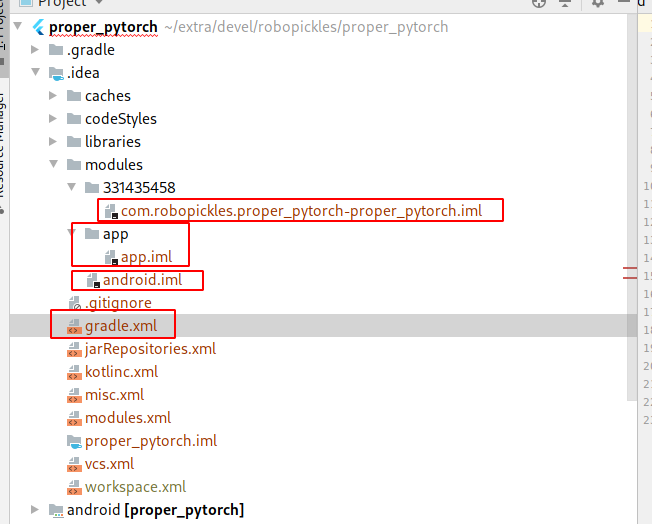
The correct project will have 3 additional iml files and .idea directory will also have gradle.xml.
Afterword#
As a result of all our manipulations, we will have a broken Project Structure menu, but the rest of the things seem to be working.